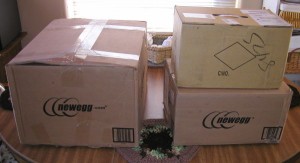
I elected to give myself a little project this weekend and it started with this small mountain of boxes:
Don’t worry, there’s a method to my madness. It isn’t often my crazy ideas have a purpose, so this time I’m making an exception. I also promised to share some of my experiences with a friend of mine who was interested in the project so he could freeload some information share in the learning experience.
The idea started about two weeks ago when I was mulling over some way of providing my mother with an entertainment system that could replace a few aging devices. Since she’ll be having back surgery next week, I figured it would be much easier for her to contend with a single device than to muck about with several. Plus, she has an old video cassette recorder that is on the verge of going wherever it is electronics go when they pass on into the afterlife, and it occurred to me that bringing her kicking and screaming into the digital age might not be such a bad idea. She’s in desperate need for a video recorder of sorts and being as I inherited her frugal nature, I wasn’t about to purchase a TiVo unit for her. TiVos are too limited anyway. She needs a relatively decent computer to sub-in for the period of time she won’t be able to sit at an actual desk. Plus, with her “real” computer being in an upstairs room and her refusal to let us bring it downstairs, I started mulling over a solution.
So far, I’m fairly impressed. There have been some teething problems–the project is still a work-in-progress–hence I’ll be posting this DIY walk-through in multiple parts.


