Motherboard Installation, but first a Word from our Sponsor: MR. WARNING MESSAGE
IMPORTANT
The AthenaTech case is small! I know, I’ve pointed this out before. But listen up–you HAVE to install the motherboard first (remove the PSU if you have problems getting the motherboard inside the case). You CANNOT install the hard disk or optical drive first. In fact, installation order MUST follow these steps:
- Install the motherboard.
- CONNECT the cabling to the motherboard.
- Install the HARD DISK.
- CONNECT the cabling to the hard disk.
- Install the OPTICAL DRIVE.
- CONNECT the cabling to the optical drive.
- Anchor cables using cable ties to avoid snagging fans.
If you install these components in the wrong order YOU WILL have to start over. Again. However, I should think this ought to be obvious given the case’s construction.
To the Mothership! Err, Motherboard
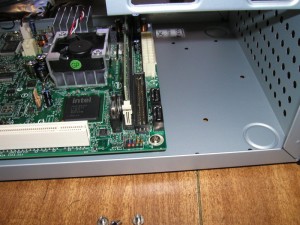
For as small as the AthenaTech case is, installation of the motherboard was fairly easy. I did have to remove the power supply. Here’s a shot after I had installed the motherboard to give you an idea of how much room the PSU consumes:
I ran into a small snag at this point in the installation. The screw holes wouldn’t line up! I initially blamed (wrongly) the AthenaTech for possessing a rogue metal spur or slight dent that was prohibiting me from pushing the motherboard back into the IO shield plate. It wasn’t the case.
The IO panel Intel provided with the case presented a tactile feel much like others I’ve installed in the past with one minor but significant exception. As it turns out, the metal contacts that are intended to touch the IO connector shielding had almost no give. With most IO panels, the gentle pressure associated with lining up a motherboard to its standoffs is enough to bend the spurs and they’ll happily accept the motherboard pressing up ever closer to the panel.
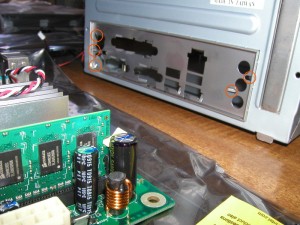
I have circled 5 regions that were at fault, and I had to bend each of them. I was required to apply a significant force just to bend these contacts which proved to me that the motherboard had no hope of moving them during the installation process:
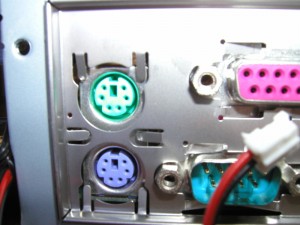
Here’s a close up of the worst part of the IO panel. The two spurs between the PS/2 mouse and keyboard connectors were bent inward at almost 45 degrees and one required me to bend it outwards with a screw driver–my thumbnail simply wasn’t strong enough!
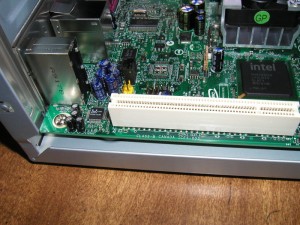
After I had resolved the issues with the IO panel’s refusal to accept the motherboard, here’s what the IO-side of the installed motherboard looked like:
Prior to the fix, that gap present between the IO panel and the connectors was roughly 4 times greater than it is in this picture. Talk about annoying.
Next, let’s wire this puppy up!


2 Responses to “Atom-based Media Center: Part 1”
Took me awhile to get around to reading this but very informative! Your shopping list of hardware and the picture examples were a lot better than some of the sites I read on the topic of mythtv type boxes and hardware. It helps to have visual examples and it’s too bad a lot of pages dont seem to be very creative in that sense. I look forward to seeing the next part about the software.
I’ve started saving up to get some of the hardware so this way I can start building sooner rather than later.
One thing I think I didn’t stress much in the article is that the Intel 945-based boards are a little under powered (or feel that way). The NVIDIA Ion systems might be a bit more appropriate, but I haven’t found one that has a decent expansion option! I’m hoping this will change. All things considered, though, the Atom 330 + i945 is a pretty decent mix for a basic HTPC. It probably won’t do HD well and flash movies are a little jerky (maybe it’s just the Youtube videos–some of them are pretty awful quality-wise).
If you want something a little more powerful, there’s a lot of mini-ATX boards out there that support Core 2 systems–I even found one by SuperMicro that’s based on the Atom. Though, one thing about the Core boxes–they can’t beat the Atom when it comes to power consumption. I think the processor idles at about 8 watts.
Leave a comment