In this tutorial, I’ll show you how to turn this:

Into this:

You’ll see (and hopefully try) the same technique I used on the background stencil images for my blog. Admittedly, this tutorial doesn’t create something exactly like the images I have, because I’ve aimed to show you how you can create text that appears water-stained or scratched and worn. The techniques are almost identical; however, you’ll want to avoid applying the scratched effect if you’re aiming for a water-stained appearance.
Difficulty: Intermediate
Preamble
I’ll be guiding you through the techniques illustrated above with GIMP 2.4.5. I realize it isn’t the latest release, but I prefer the UI over 2.6. I have both installed, so please don’t quibble over the version differences–not much has changed. Trust me on this.
Create a New Image
Let’s create a new image. We’ll start with something big so we have room to breath. Go to File > New and set up a new image with the following attributes:
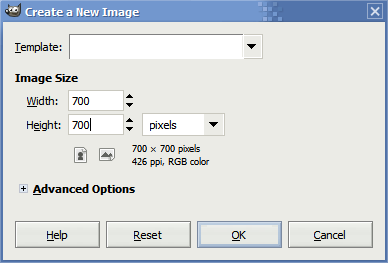
You could create a smaller image if you choose. Just be aware that if you make the image too small, the blurring we’ll do later in the tutorial will be cut off around the edges of the image.
For best results scale everything to the exact size you want it before beginning this tutorial.
Getting Started
Now that we have a canvas to play around on, let’s get started! First, we’ll need to do a few fairly obvious steps:
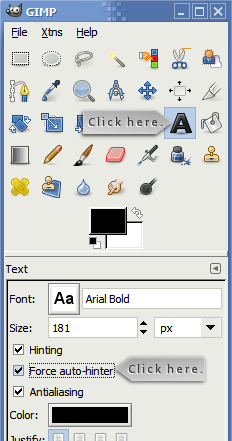
Click on the Text tool and check Force auto-hinter. Now, click somewhere on the canvas and create some text:
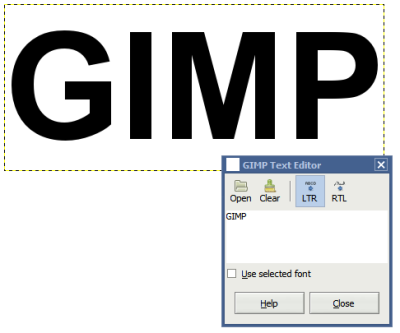
Pick a font you like best and type in some text. It doesn’t have to be fancy nor anything unnecessarily complicated. Maybe a pet’s name, your favorite color, girlfriend/boyfriend’s name, the name of a state, a city, your password (just don’t post it!)–anything!
Setting the Stage
We’re going to need a little bit of transparency to help us along. To do this, right-click on the layer we just created and select Add layer mask.
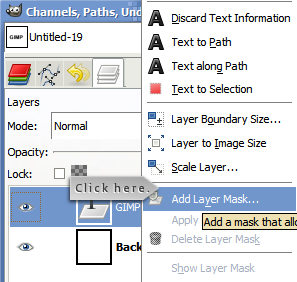
You’ll be prompted with a box like this:
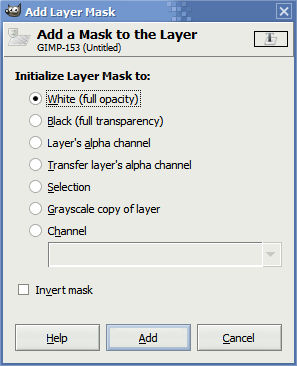
Make sure you create the mask with full transparency (white) and click OK. Your layers toolbox should look something like this:
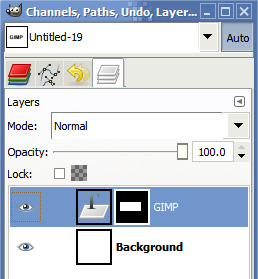
Let’s go ahead and create a little bit of texture. Right-click anywhere on the canvas and go to Filters > Render > Clouds > Solid Noise. Adjust your clouds so they look something like this:
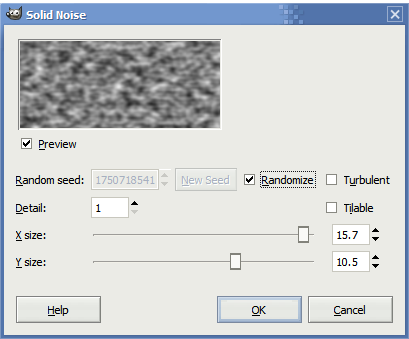
Once the clouds look fairly well-distributed, click OK. You should now have something like this:
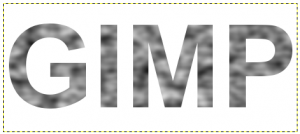
We want this first filter to wash out some of the uniformity of our text color but we need to change a few things first.


2 Responses to “Scratched/Worn Text Tutorial in the GIMP”
Wow that’s a lot of screenshots!
Thanks for the step-by-step, Ben! That tutorial makes for a very cool text effect!
Yeah, I think I went a little overboard. All told I think I finished with 56 screenshots of the actual work. Thankfully, I was able to trim it down significantly.
Leave a comment