I was asked by a friend of mine how to best go about reinstalling Windows while keeping his other partitions intact. It’s really easy, but there are some points where it’s necessary to exercise caution! This little quickie is a guide on how to do exactly that.
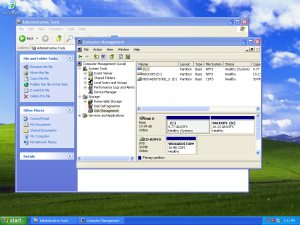
First, all of the screen shots from this article have been taken from a freshly installed virtual machine. As such, there’s virtually nothing on the disks besides Windows and an example directory I created on the partition we want to keep. Here’s what I mean. First, our disk and partitions:
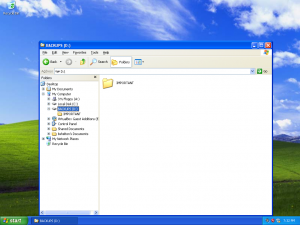
And, for the sake of argument, I’ve created a directory fittingly called “IMPORTANT” on our second partition. This is the one we want to keep:
Aside from the almost clinical feel of the fresh install, this structure is pretty typical for most environments where you’ll be using the D partition for data (and games) and this C partition for Windows. Of course, your other partition won’t necessarily be D. It could be E, or F, or just about any other letter of the alphabet. Except for letters reserved for other functions, like floppies.
Now, before I start to explain the rest of this process, you’ll need to do the following before you get started and make sure you have the items on this list.
- Make a backup of your most important data.
- Make a backup of your most important data.
- Make a backup of your most important data.
- Make sure you have your Windows disc. If you’re installing Windows XP, you’ll need a Windows XP disc.
- Make sure you have your CD key. This is your license for Windows. If you don’t have it, you won’t be able to reinstall.
- It is possible to extract your key from your existing Windows install, but that is beyond the scope of this article.
- If you have any important software on your system (which you do), make sure you have the original discs or know where to get it again. If you’re not sure, make a list before you restart or turn the computer off.
- Knowing how big your hard drive is is useful, especially when you need to spot your partitions, but not strictly necessary.
- If you know what hardware you have in your computer, it might be handy to have some updated drivers on hand or your driver disc. Trust me on this.
- Also, check your backups. Make sure you can read them. There’s no point backing up data if it can’t be read.
- Make a backup of your most important data.
There we go. Having said that, there’s one little obligation I have, and that is to point out that I make no guarantee of the fitness of the following information for any particular purpose and grant no warranty in the event all hell breaks loose. Use this information at your own risk.
Let’s Reboot
Okay, before you actually do reboot, go ahead and place your Windows disc in the CDROM drive. Autorun might cause something to pop up; if it does, just close it. It’s a good idea to have the disc in the drive ahead of time, because if you try to stick it in when the computer is booting, some computers (and some drives) like to trick you. First, the drive will pop open. So, you’ll try to stick the disc in. Then it’ll decide it really didn’t want to cooperate and slurp up the tray. It’s like whack-a-mole, but you really don’t want to play whack-a-mole with $300 worth of software and $20 worth of hardware. (Trays are surprisingly hard to break–intentionally, at least.)
Got the disc in the drive? Good. Let’s restart.
The BIOS
I can’t offer much help here because all BIOSes are different, so I’ll assume you know how to set up the BIOS to boot from your CDROM. I will give you some tips, however.
Nearly all BIOS can be accessed via one of two hot-keys during boot. The trick is to pay attention whenever the system says “Press <KEY> to enter setup” or some such. Generally, the keys you’ll need to look out for are F2 or DEL. Some systems, specifically laptops, require you to press F11 or F12, and that might even apply to Dell desktops. In either case, the only thing to do is pay attention. Also, if you see something that says “Press <KEY> for a one-time boot menu,” you’ll want to press that as it avoids the complication of tooling around with the BIOS.
Once you’re in the BIOS, you’ll need to look for boot settings, boot order, or just about anything with the word “boot” in it. When you find it, you can usually use the arrow keys to maneuver to it (most Intel and some Phoenix BIOSes) if it’s sort of tab-like or highlight it and press enter (most AMI BIOSes) if it’s a menu system. With some fooling around, you’ll probably figure out how to set the CDROM as the primary boot device. Check your manual–or better yet, Google–if you can’t quite figure it out. When the system boots up, it’ll usually give you some numbers you can write down and need to search for something if you’re completely lost.
The Boot
Successfully booting to the Windows XP disc will give you a menu similar to this:
As setup indicates, just press any key (I usually tap the space bar because it’s big, fat, and requires absolutely no coordination to impact with a thumb, even from across the room–I have talented thumbs).
You’ll then see a blue screen. Don’t worry, it’s not a BSoD; it’s an installer blue screen. There may be a subtle but surprising difference; although, in both circumstances, your computer is completely useless. Here’s what it’ll look like at first:
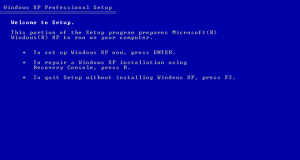
You’ll then be presented with a choice. Press ENTER to set up Windows XP, R to repair your Windows install, or F3 to quit setup:
Here, you’ll want to press ENTER to continue.
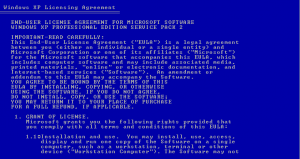
Next, you’ll be presented with the most boring piece of technical literature ever devised. It’s called the EULA and basically says that if you do anything bad, like giving away your XP disc to complete strangers, Microsoft reserves the right to circumcise you, cannibalize your first born, and other really nasty things like force you to watch reruns of some horrible 1980s sitcom. It gives you a couple of options, like F8 (I hope that’s not a phonetic for fate):
Just press F8 to skip this. Besides, I was joking about the EULA part. No one watches 1980s sitcoms anyway.
Pay attention
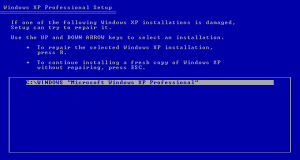
If you skipped passed the rubbish I wrote above (I don’t blame you), there’s really only one place you should pay attention, and this is it. Here’s where Windows setup will give you a choice of Windows installs. In my example, I have exactly one. If you’ve accidentally attempted to install Windows multiple times, you may have more than one listed here. If so, just give it your best guess. You’re looking for “Windows XP Professional” (or Home) installed as C:\WINDOWS. If anything else pops up, just examine it carefully. The screen will look like this:
Remember which partition this was under (C or D or anything else) and then press enter. Don’t worry if you make a mistake just yet. If you do, you can always press the reset button on your computer or power if off and try again. Or press ESCAPE a bazillion times until setup realizes that you’re in trouble. (Doubtful.)
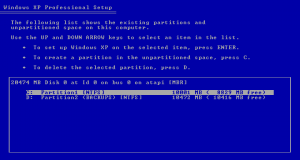
You’ll then be greeted with a list of partitions. Remember how many drives you have? If you have a C drive and a D drive, you’ll see them both listed here. Obviously, you only want to highlight the one your Windows install is on. In most cases, this will be your C drive, which is conveniently already selected. Here’s what this screen looks like:
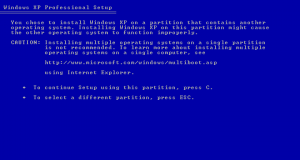
Windows setup will ask you a few “are you sure?”-type questions. Like this one:
Here you can press C to continue or ESCAPE to go back and pick another partition. It won’t tell you which you selected (yet). So, if you’re confident in your choice, press C.
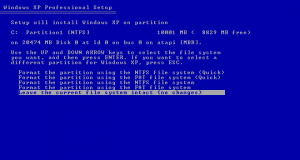
You’ll then be asked how you want to format the drive:
I always pick Format the partition using the NTFS file system (quick) because it’s quick, and I don’t have to wait for the Second Coming just to install an operating system. Trust me, there’s no important difference. The end result is the same.
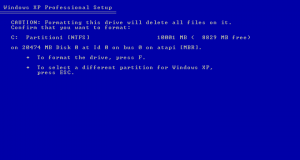
And then this brings us to… are you really, really, really, really sure you want to do this, huh, huh, huh, are you, are you?
Microsoft is so polite. They make you pass through about three dialogs before they finally clue you in on whether your original choice was the one you really thought you made. Fortunately, if you screwed up, you can hit ESCAPE here, too.
But here’s the big decision. Windows setup will give you exactly two choices: the ESCAPE option I mentioned above and F for format. Examine the partition it has listed, including the size and the volume name (if applicable). It should say C: for most installs.
Think about it.
…then think about it some more.
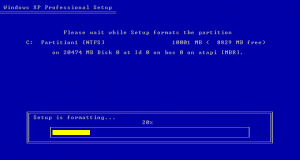
Once you’re ready to wipe this install, press F. There’s no fanfare. There’s no fireworks. There’s no screaming (not normally, that is). There’s just a fairly unassuming screen with a progress bar:
And that’s it. You’ll have the typical Windows-setup questions to answer, like your timezone, your name, rank, serial number. (Okay, just the serial number and name.) Then after about 30 minutes, you’ll be on your way to a clean install.
Oh, and don’t forget about the driver disks. And your backups. You will want to restore the data you saved earlier.





Leave a comment